![]()
![]()
![]()
![]()
![]()
![]()
![]()
![]()
![]()
|
|
TutorialExporting an .X File With 3ds Max 3 or 4 Using the DX SDK Exporter Written By Microsoft MVP: Eric DeBrosse Related Documents:
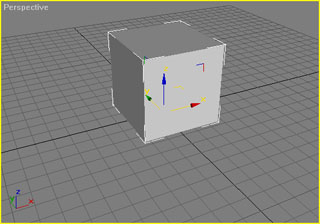
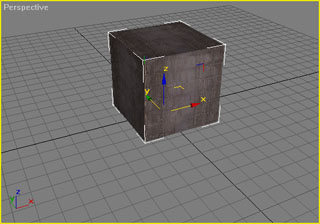
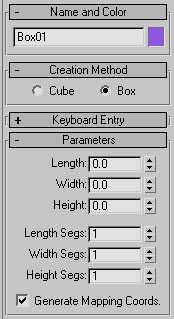
In this tutorial, I will show you how to export a file from Discreet's 3ds max software, into a format that can be loaded directly into a Direct3D application. For this tutorial, you will need a copy of 3ds max R3 or R4, and the GUI based Max plug-in from the DirectX SDK. (Make sure you get the exporters from the "SDK Extras" page when you download the SDK.) Support for Max 4 was included with the 8.1 SDK. You should note that the SDK comes with the source code for the exporter, this way you can customize it to your individual needs. The plug-in may need updated for newer versions of Max. See the readme.txt file included with the plug-in for more important details. First, we need to get the correct plug-in installed. Copy XSkinExp.dle from the SDK download (or the one you created using my tutorial) into your <3DSMAX path>\plugins folder. Make sure you copy the right file depending on the version of Max that you are using. Once installed, the File/Export dialog should now have a file type called .X File. In Max 4, make sure the plug-in shows up in the Customize/Plug-in Manager dialog. You might need to right-click and select Load New Plug-in from the popup menu. If it still does not work, make sure you copied the right version of the exporter. You might also need to re-compile the exporter using the Max SDK that came with the version of Max that you have. The exporter does support Character Studio animations, however it is very tedious to set up correctly. Let me just say, it does work. In fact, the tiny.x file that comes with the DX SDK was created, I understand, using Max. One thing to note, any modifiers above the Physique modifier will be ignored. Animation is an advanced topic that will not be covered much further in this tutorial. Lets test out the exporter now. Start a new scene in Max and just create a simple box.
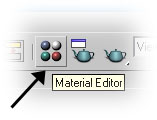
Next, open the Material Editor from the toolbar.
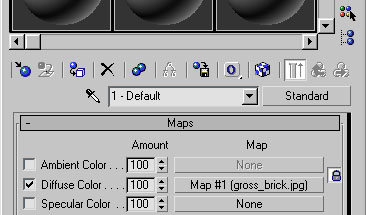
Scroll down to the Maps section and place a checkmark next to Diffuse Color. (The exporter only supports diffuse maps and one set of texture coordinates.) Click the None button next to the diffuse color check box to open the Material/Map Browser dialog. We will double-click the Bitmaps item from the list to open the Select Bitmap Image File dialog. Open a texture.
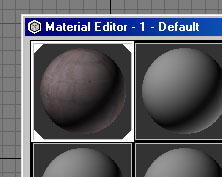
The Material Editor should now show you a preview of your texture in the currently selected slot. Note: We will not be setting our texture coordinates using the Material Editor.
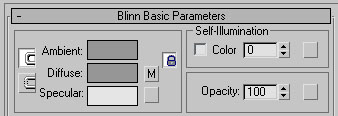
You might want to use the Blinn Basic Parameters to set the Diffuse and Specular colors of your material. We are locking the diffuse and ambient colors together (note the button pressed down next to the colored boxes), Direct3D treats these colors as the same thing.
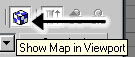
Before we close the Material Editor dialog, make sure the Show Map in Viewport button has been enabled.
If you can't see the texture in the viewports, it will not be exported. Drag and drop the texture from the Material Editor preview slot to the cube in one of your viewports.
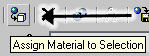
You could also use the Assign Material To Selection button to add the texture to your cube, if it is currently selected. You should now see the texture on the cube. If not, we might need to create some texture coordinates.
If the Generate Mapping Coords. check box was not enabled when you created the box, we will need to assign some UV coordinates to the mesh.
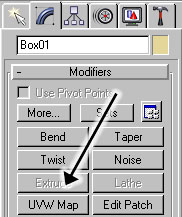
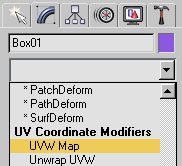
Select UVW Map from the available Modifiers to add it to the modifier stack. In 3ds max R3, you might need to click the More... button to get the UVW modifier, if it's not already in your standard button set. In 3ds max R4, it can be found in the drop-down list.
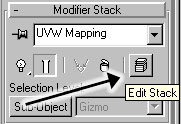
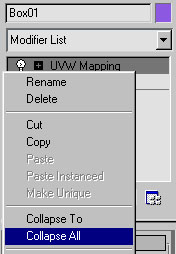
Select the mapping mode and UV coordinates to apply the texture to the cube however you wish. Next, we need to collapse the modifier stack; if we want the specified UVW mapping to export. Modifiers in the stack will not be exported unless they are first collapsed. The exporter will not automatically combine all the modifiers together. If the stack is not collapsed, only the base object (the box in this example) without the UVW mapping will be exported. In Max 4, right-click on the modifier stack and select Collapse All from the popup menu. In Max 3, click on the Edit Stack button. Then click on the Collapse All button on the Edit Modifier Stack dialog. If you get a "Warning" dialog, just select Yes to continue. Note: You might want to save your mesh to a .max file before you collapse your modifier stack. This way you can go back and edit your modifiers later. Once collapsed, all that will be left is the resultant mesh object.
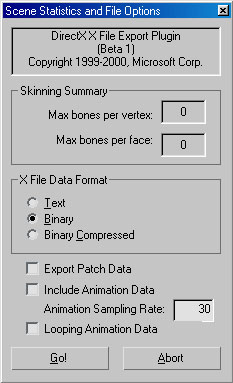
Now select Export... from the File menu. On the export dialog, select X-File as the file type to export and enter a filename such as box.x. After clicking the Save button, the DirectX X File Export Plugin dialog should open. If you are exporting an animation with skinning data created using Character Studio (which we are not) the Skinning Summary should show the number of "bones" that will be exported. If there are no bones, something went wrong and you might as well not even try to export the file. Since we are not exporting animation in this tutorial, we can ignore the Skinning Summary. (Note: keyframe animation without skinning can be exported by the exporter.) We also don't need to enable Include Animation Data or Looping Animation Data. Since our box is not a patch, we don't want to enable Export Patch Data either. If we select the binary data format, we will not be able to open the file in Notepad.exe, however the file may load faster. The compressed mode could also be used to save file space. Once you are ready, click the Go! button to create your x file.
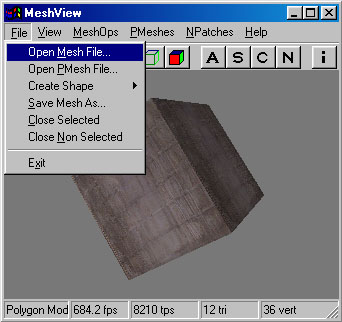
OK, so does your file load and display properly? The Mesh Viewer utility that comes with the DirectX SDK can be used to test your .X file. From the File menu select Open Mesh File... and then browse to and open your box.x file.
One thing to note, if you try to open this file on a machine that does not have the texture in the exact same path as your machine, it will not load. The full path to the texture is stored in the .X file. If you saved your .X file in the text format, you could edit the path manually with Notepad.exe. Your application could programmatically strip the path from the filename in the .X file and then add its own custom path to the filename. There are a few bugs in the exporter that you may run into. You might have noticed its dialog has the word beta on it. You do have the source code - edit it to fit your needs! Whenever I discover bugs, I will post their corresponding resolutions here. For the most part, the exporter worked quite well for me. So hopefully, you will have now learned the basics of how to export an .X file that can be used in your Direct3D applications. Many SDK sample framework applications utilize .X files, so they would be a great place to look for information on how to create your own custom loaders. Tutorials related to loading .X files in Visual Basic may be added to this site at a future date, so be sure to check back often! |
|
|