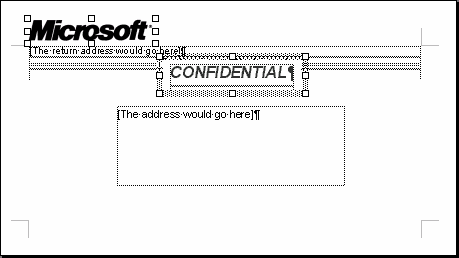
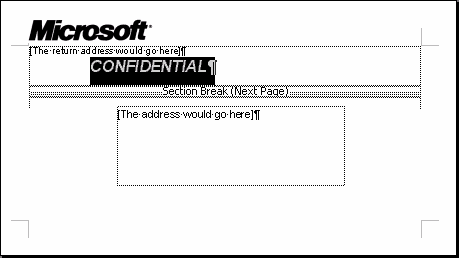
Modifying the appearance of your envelopes
Article contributed by Doug Robbins and Dave Rado
There are two principal components to the addressing of an envelope – the address to which it is to be sent and the return address of the sender. The position and format of each of these components is dictated by the definition of the following two styles in Word:
|
Envelope Address |
|
Envelope Return |
The Envelope Address style contains a frame, into which the address is entered. The position and size of the frame dictates where the text appears on the envelope when you select Tools + Envelopes and Labels + Add to Document.1
If you click in the frame and select Format + Frame, you will see that the width and height of the frame are set to “Exact” values by default; and the position of the text is further (and confusingly) influenced by a gigantic (and pointless) left indent defined in the paragraph properties of the style.
These features can lead to problems, especially with custom-sized envelopes or with addresses containing more information than can fit within the fixed size of the frame. You may even find that with some envelope sizes, the vertical position is such that your address is in the unprintable area for your printer!
You can, however, modify them, either in the Envelope Address style itself or, if it's only a one-off change, you need for a specific envelope, in the frame properties of your address.
To make a one-off change for a specific envelope
Click in the address, and the frame borders will become visible.
Select your address, and either drag the indent to the left margin using the ruler, or select Format + Paragraph and set the Left Indent to 0.
Change the font and point size, if you want to.
Then click on the frame borders, and to alter the width and height, you can drag the edge handles; hover over an edge handle, and when the mouse cursor turns into a two-headed arrow, start dragging. While you are dragging it, the mouse cursor will turn into a cross:

![]()
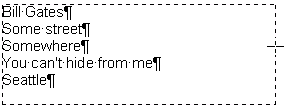
Figure 1
To alter the position of the frame, hover over the frame border with your mouse until the mouse cursor turns into a four-headed arrow:
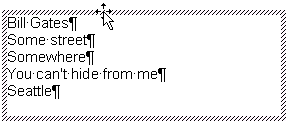
Figure 2
Then drag the frame to where you want it.
Finally, select Format + Frame, set the height to “At least” instead of “Exactly”, and do any other fine-tuning you wish to do:
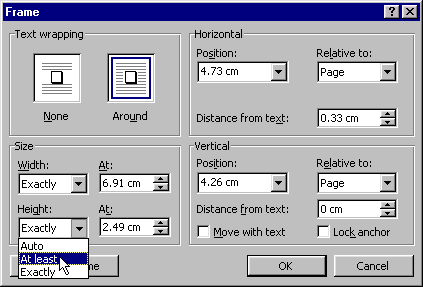
Figure 3
Alternatively, you could select Format + Frame at the outset and type the measurements in, but it is easier to do it by dragging, using the dialog for any fine-tuning you may need.
To change the style for all envelopes
Get the frame, font and paragraph properties as you want them by following the above steps.
If you are using Word 2002 (Office XP), make sure the box for “Prompt to update style” is checked under Tools + Options + Edit – unfortunately, it's switched off by default, and defining styles is far more difficult unless the option is switched on.
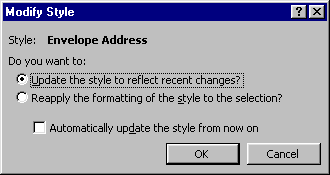
Then select the address (make sure the paragraph mark is selected). Now click in the styles bar on the formatting toolbar, and press Return: a dialog will appear asking whether you want to “update the style to reflect recent changes”; click OK. The changes you made to the frame and indent will now be reflected in the style definition for that document.
|
|
|
 |
|
Figure 4 |
||
To make the updated style definition available to all new documents (or if the current document is attached to a template other than Normal.dot, then to all new documents based on that template), select Format + Style + Modify, and check the box that says “Add to template”.
If you are using Word 2002, it's a little more complicated, because the FormatStyle command is not on the Format menu. Instead, in the Styles and Formatting task pane, hover the mouse over the box at the top that shows the style in use. A down arrow will appear. Click the arrow to drop down the menu and choose “Modify”. This takes you to the Modify Style dialog and you can now check the “Add to template” box.2
Then hold the Shift key down and select File + Save All.
Once you have created an envelope, one strategy worth considering is to save the layout as a template, as this can greatly simplify creating further envelopes of the same type.
Incorporating special text (such as “Confidential”) or graphics (such as a logo) in the envelope
As mentioned above, it may save you a lot of time in the long run if you create your own envelope templates. If you do so, you can incorporate any special text or graphics you like into that template.
However, if you don't want to go down that route, but if, for example, you would like all documents based on your Letter template to generate envelopes that automatically incorporate special text and/ or graphics, you can make use of a built-in AutoText entry called EnvelopeExtra1. (There is also a built-in AutoText entry called EnvelopeExtra2, but only one AutoText entry will ever be required). If you want to do that, here are the steps to follow:
First insert the special text and/or graphic
|
1. |
If you want to include special text such as “Confidential”, either:
|
||||
|
2. |
If you want to include a graphic, select Insert + Picture + From File, make the picture floating; and (under Format + Picture), set its wrapping to “None” (Word 97) or “In front of text” (Word 2000 and higher). If you inserted some special text in step 1.a) without using a text box, make sure that your graphic is anchored to the paragraph that contains your special text (as long as your cursor was in that paragraph when you inserted your graphic, it will be). |
||||
|
3. |
If you want both special text and a graphic, follow both steps 1 and 2. |
Then select your text and/or graphic
|
1. |
f you have inserted special text in a text box, select the text box; and if you have also inserted a graphic, select them both by holding the Shift key down while you select them. If you have only inserted a graphic, select the graphic.
|
|
2. |
Or if you inserted your special text without using a text box, select its paragraph, making sure that the paragraph mark is selected. This will automatically mean, if you did also insert a graphic, the graphic's anchor, and therefore, in effect, the graphic itself, will also be selected.
|
Then store the text and/or graphic as an Autotext entry
|
1. |
Now select Insert + AutoText + AutoText, and where it says "Look in", select the template you wish to store it in.3 Type EnvelopeExtra1 and click OK. |
|
2. |
Hold the Shift key down and select File + Save All in order to save the change to your template. |
All new envelopes based on documents that, in turn, were based on that template will now automatically include the contents of your EnvelopeExtra1 AutoText entry.
__________________
|
In Word 2002, that's another layer deep – Tools | Letters and Mailings | Envelopes and Labels – although you can, if you like, make your life easier by dragging and dropping the “Envelopes and Labels” button back onto your Tools menu where it belongs; see How to assign a Word command or macro to a toolbar or menu. |
|
|
Alternatively (and a better idea), you can restore the much greater simplicity of using the Format Style dialog by dragging the FormatStyle command onto your Format menu. See: How to assign a Word command or macro to a toolbar or menu. |
|
|
Don't use Insert + AutoText + New, because, unfortunately, that does not allow you to specify where the entry should be stored. |
Download printer-friendly version: EnvelopeFormat.pdf

